Create an Attendance List
To start, go to Event Check-in and select Add New. After filling in the Attendance List Name, you have two options to create attendance list:
- Connect to a Form Database
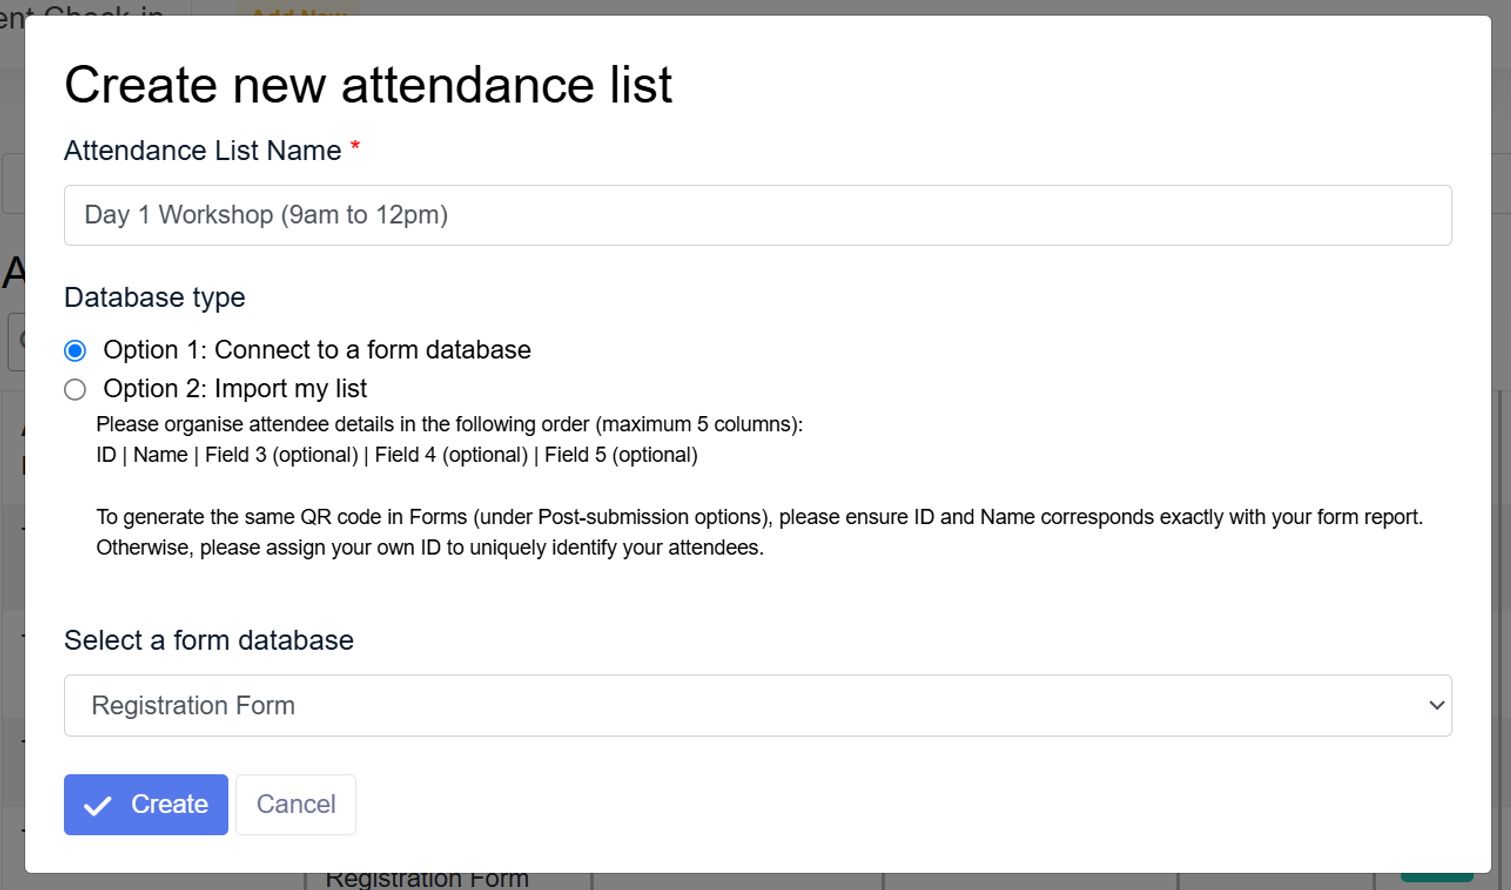
By connecting to a form, attendee data can be synced to the attendance list automatically. Both ID and Name will be retrieved and you can add up to 3 more attendee details from the form database.
Note: Please ensure that “Name” field is used in your form to capture attendee’s name.
- Import Your Own List
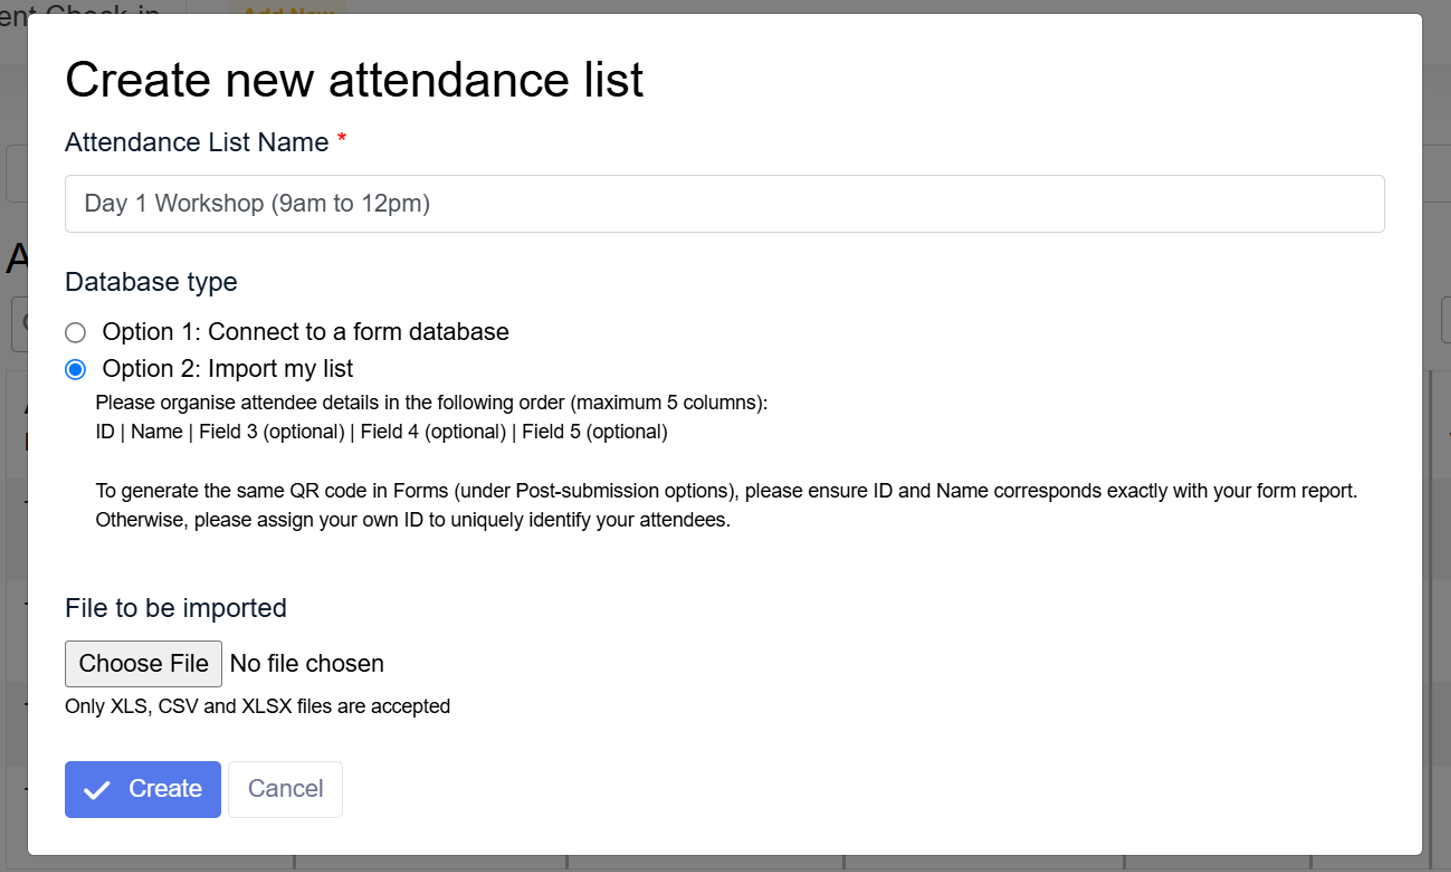
Upload XLS, CSV, or XLSX files formatted with up to five columns, where ID and Name are mandatory. Maximum number of imported attendees are subject to your plan limit. Here’s an example:ID Name Country Company Dietary Preference 1781 John Tan Singapore Company A None 1782 Rachel Goh Malaysia Company B Vegetarian 1783 Anita Indonesia Company C None
To generate matching QR codes, ensure your ID and Name match the form report exactly.
Categorise Your Attendance List
After creating the attendance list, you can add up to three additional attendee details to be shown on event check-in (e.g., Company Name, Dietary Preference). Category field will be used to categorise your attendees (e.g., Attendee Type) on the app dashboard for quick attendance overview. You can easily access below settings by selecting Edit.
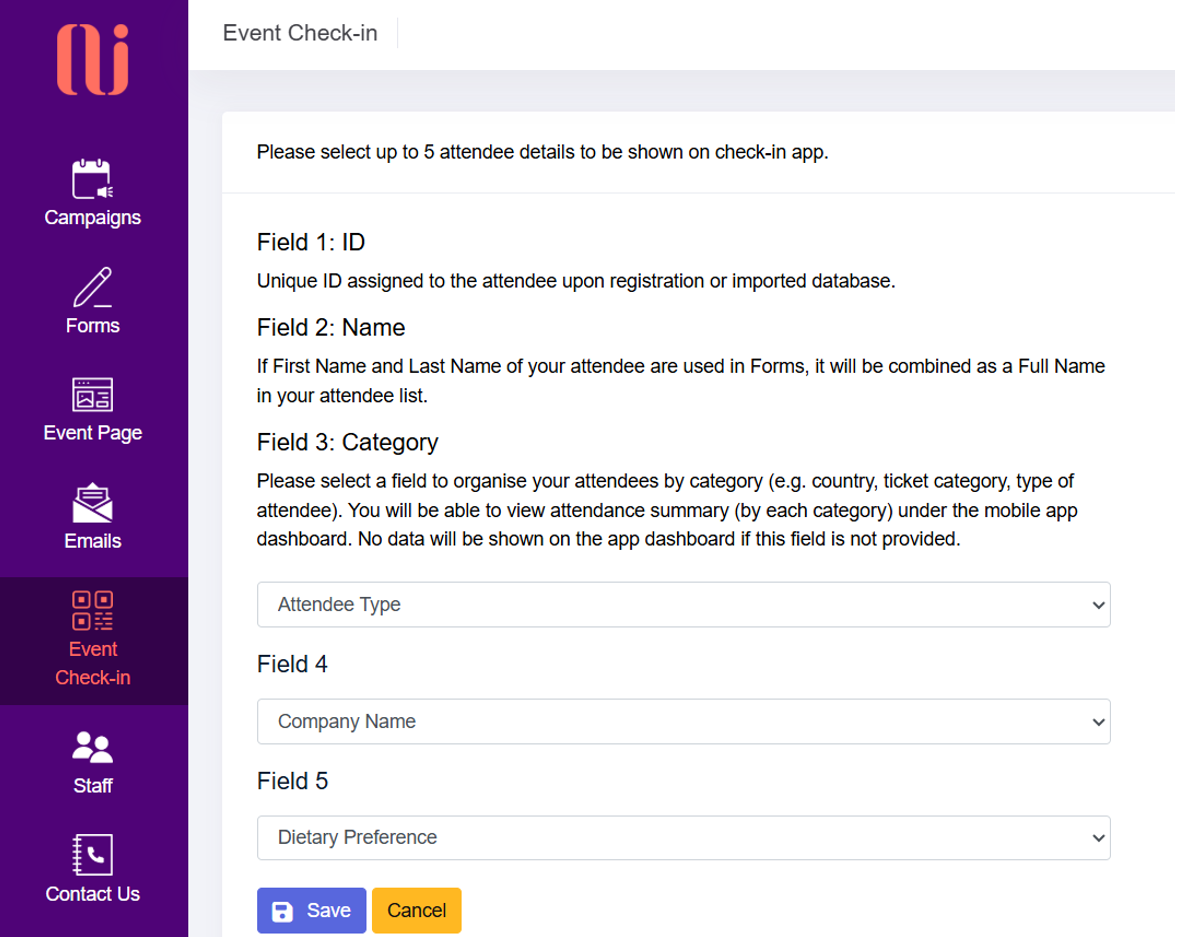
| Fields | Field Type | Description |
|---|---|---|
| Field 1 | ID | Unique ID assigned to the attendee upon registration or imported database. This field cannot be changed. |
| Field 2 | Name | If First Name and Last Name are used in Forms, they will be combined as a Full Name in your attendee list. This field cannot be changed. |
| Field 3 | Category | This optional field can be used to categorise your attendance list (e.g., country, ticket category, type of attendee) on mobile dashboard. No data will be shown on the dashboard if this field is not determined. |
| Field 4 & 5 | Additional fields | Optional attendee details. |
If the attendance list is connected to a form database, all attendee data can be shown except the following:
- Salutation (under Select field)
- Checkbox Group
- Password
- Agreement Checkbox
- File Upload
- Text Area
Check-in Your Attendees
Using the OUI Events App
- Download OUI Events App on Google Play.
- After logging in, select your Campaign and Attendance List.
- You will be directed to the Dashboard, which provides an overview of attendance and attendance rates by categories (if the category field is used).

- Use the Scanner to scan QR codes and check attendees in.
- Alternatively, toggle to Attendees to manually check in/out by swiping left on attendee’s name.
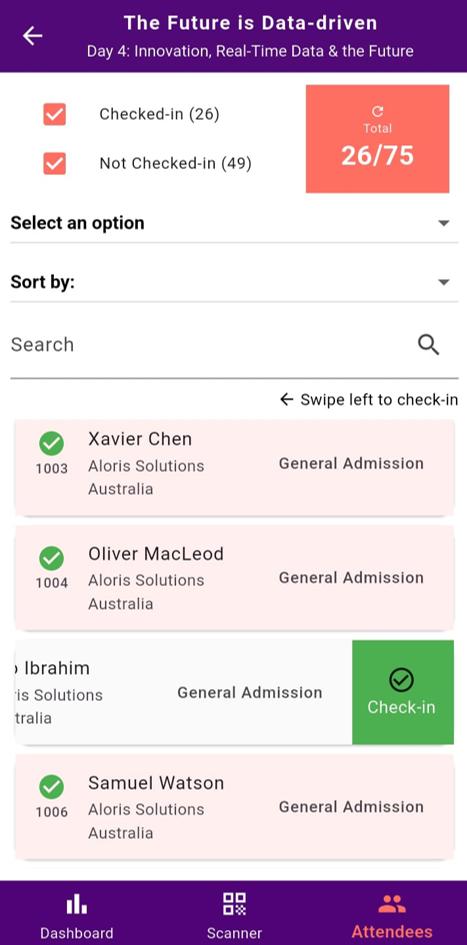
- Filter, search, and sort attendees for smooth management.
Using Browser Mode
- Under Event Check-in, select View to see the attendance report.
- Check in/out attendees directly in the browser.
- After your event, download the attendance report in Excel format under Report.